


 Please bare with me as I make some layout changes :)


Materials needed:

- Assorted color felt squares
- Glue gun
-Cotton string (aprox. 56”)
-Paper, pencil and cardboard
To start:
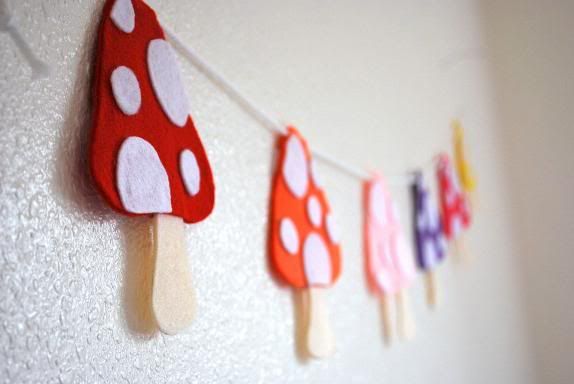
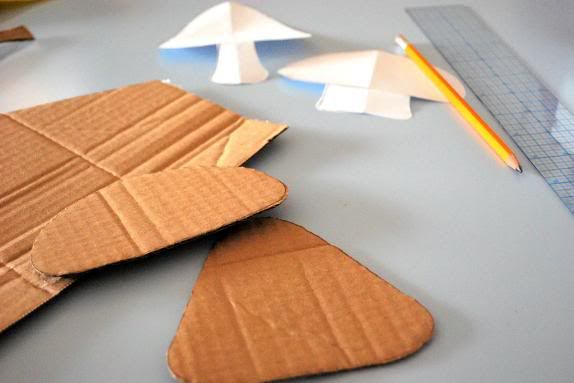
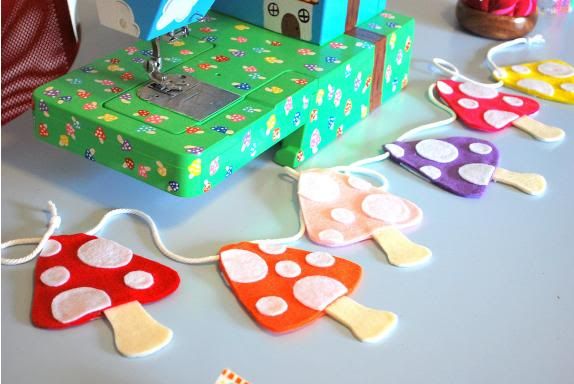
Draw out your mushroom cap and stem. If you are not to handy with that, a google search will give you quiet a few free templates you can use. Trace your design onto cardboard, and cut out on each cap, base, as
Trace 2 of each mushroom cap and base, per mushroom. You can use different colors, or all of one. It is up to you.
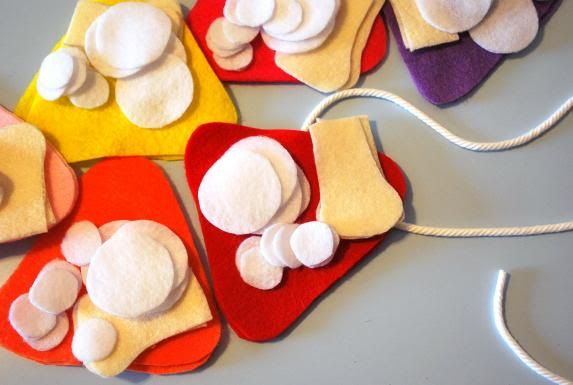
Trace your mushroom spots. I used 1 ½” and ¾” circles. The amount you need to cut, depends on how many or few spot’s you want on your mushrooms, mine have between 9-10 each total, front and back.
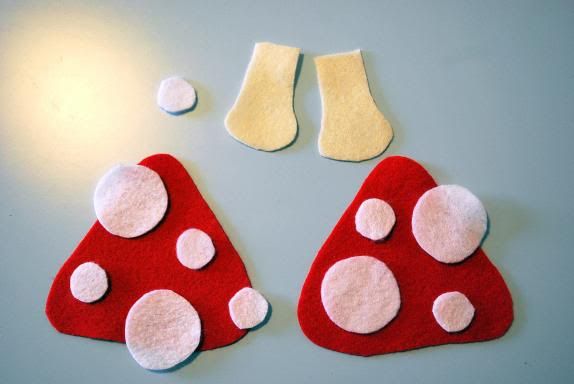
Arrange and glue your spots, and glue together your mushroom stem.
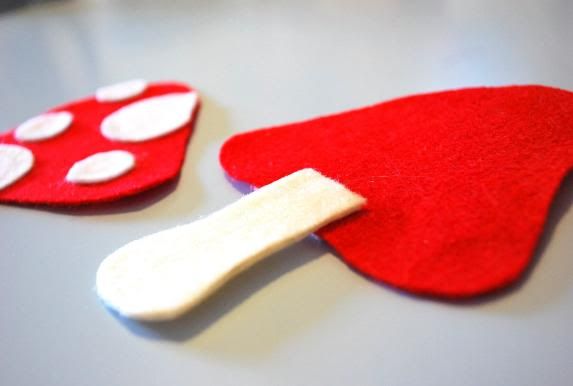
Next, glue your stem to bottom center of back-side of one of the mushrooms. Glue mushroom cap in place, leaving a small opening at the top.
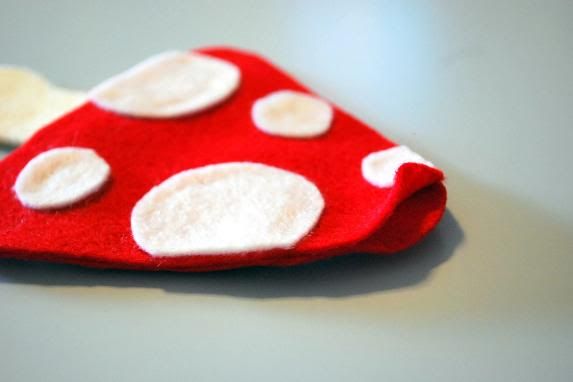
Trim any excess felt, and pull away those pesky little glue threads as well J
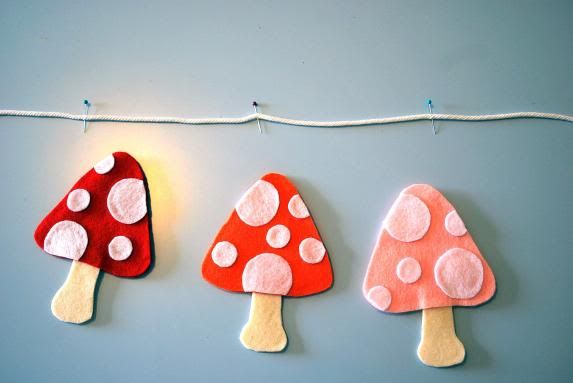
Use a few pins to properly space your mushroom’s. sandwich the string, between the top of the mushrrom caps, and close up with a bit of glue.
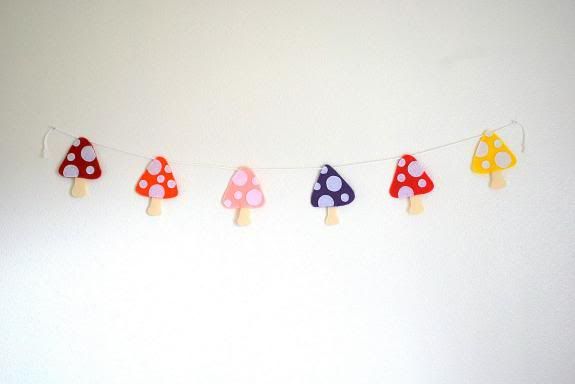
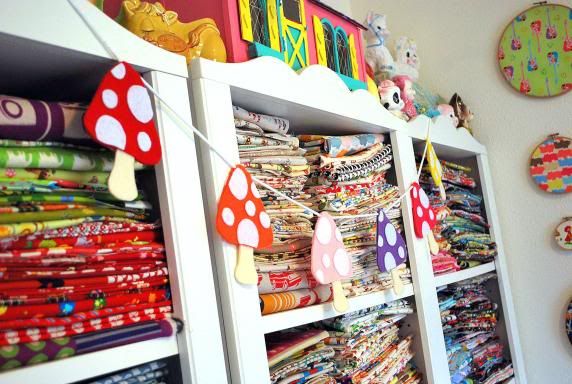
All done!


4 comments:
THIS is DARLING!!! Thanks for sharing!
Those are adorable!!
~Rachel
so simple and sweet.
http://patchworkposse.com/blog
magnifique!! j'adore!! merci beaucoup pour ce joli tuto!! ♥
Post a Comment